
How to Design a Custom Exhibition Stall Fascia That Works From Every Approach
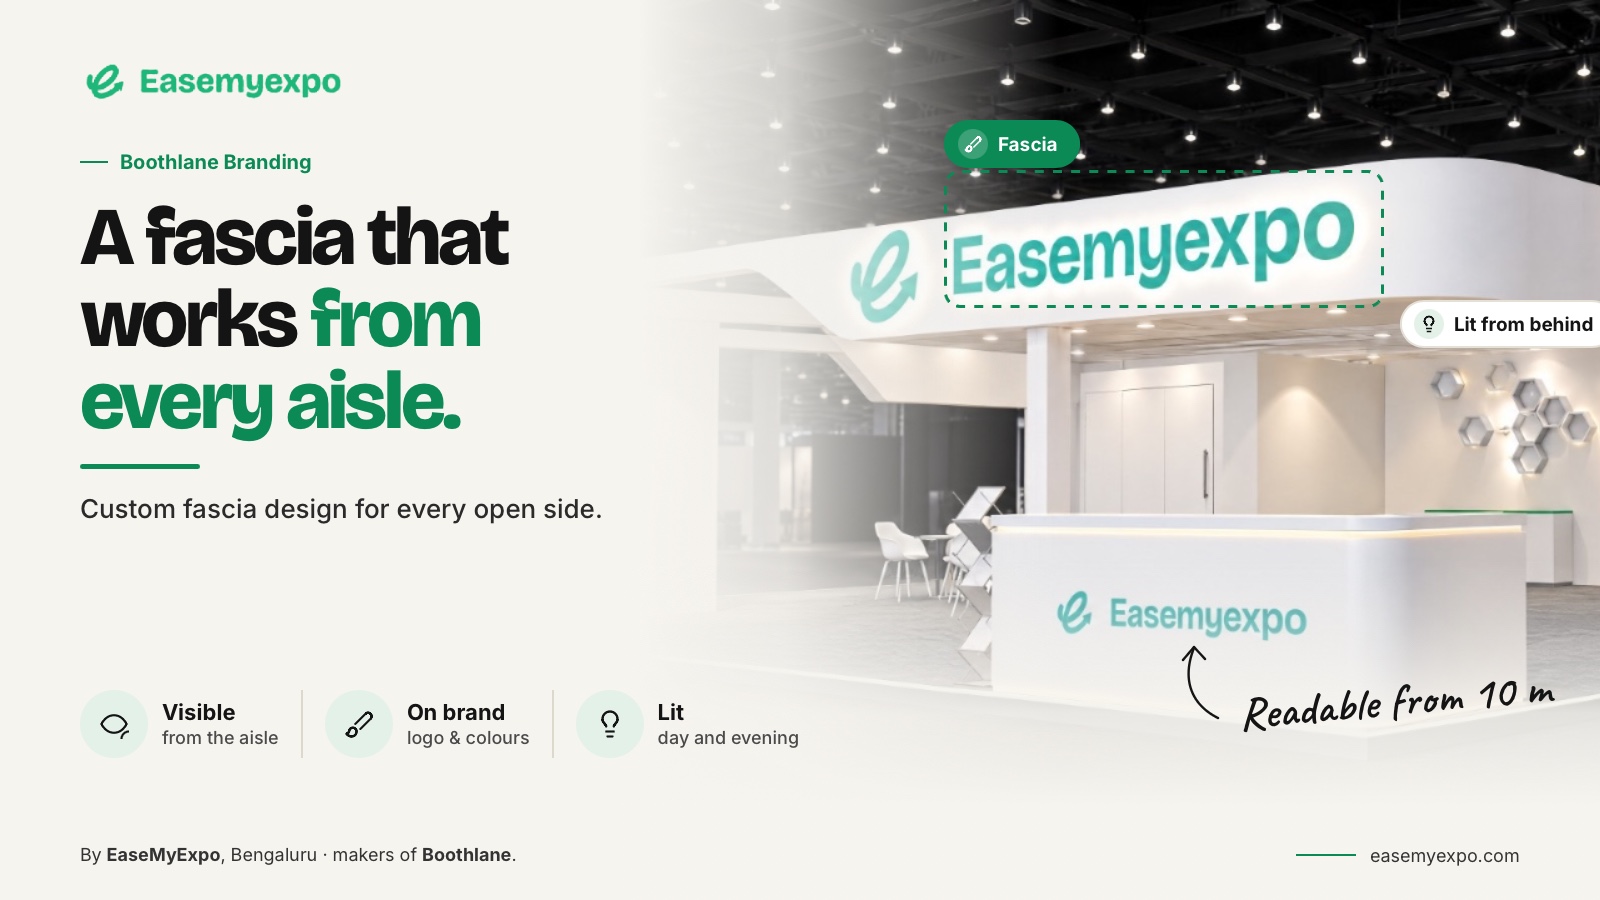
Design a custom exhibition stall fascia by starting with the booth's open sides, brand message and intended visitor approaches. Choose a form that supports the layout, use the actual artwork and inspect it from multiple viewpoints. Keep the visual design separate from the engineering, material and installation decisions needed to build it.
The fascia is not merely a place to put the logo after the booth is finished. Its shape and position can affect how the entire stand is understood.
At a glance
- Main question:** Does the approach help you make and communicate the decisions involved in fascia design?
- Use a real brief:** Test it with a two side open booth where the company name must remain legible from both aisle approaches without blocking the interior.
- Watch for:** designing the fascia only for the hero render and missing clearance, sightline, artwork or production implications.
- Before approval:** Keep dimensions, organiser requirements, artwork status and unresolved technical questions visible beside the design.
What should the fascia achieve?
Decide whether it primarily identifies the brand, frames the booth or supports a product message. It may serve several purposes, but the hierarchy should be deliberate. When every surface competes for attention, the visitor has to work harder to understand the booth.
Start with the actual brand assets. A long wordmark, a compact symbol and a campaign headline each need a different composition. Do not design around placeholder text and assume the approved artwork will fit later.
Keep the message tied to the visitor's approach. A fascia that looks good in the front render may be less useful when the main traffic arrives from an open side.
How do open sides change the design?
Review every legitimate approach to the booth. A one-side-open stand has a different communication problem from a corner or island arrangement. A corner design may need to explain the brand from two directions without making the whole structure visually heavy.
Freeman's booth-design guidance distinguishes common arrangements by aisle exposure. Use those descriptions as context, while confirming your actual booked configuration with the organiser.
Freeman exhibit stand design guidance
For an illustrative corner booth, compare an L-shaped brand treatment with a more open approach. Keep the same footprint and product arrangement so the team can judge the fascia decision rather than two unrelated designs.
How can you create a custom fascia in EaseMyExpo?
EaseMyExpo's documented scope includes drawing custom fascia in 2D or 3D, as well as choosing premade options. This gives the designer a way to develop the form around the brief rather than treating the preset as the only possible solution.
Boothlane by EaseMyExpo launch coverage — EVENTFAQS
Begin with a simple shape and test its relationship to the displays and entrances. Add the brand treatment only after the overall position makes sense. A complex form is not automatically a better design if it hides the product or makes the entrance difficult to read.
The designer remains responsible for the creative decision. High-quality rendering can help present the result, but AI is not deciding the booth's brand hierarchy or technical construction.
What should you check in the 3D view?
Inspect the fascia from the intended aisle positions and from inside the stall. Check whether it overlaps another sign, hides a screen or creates an unintended visual barrier. Look at the rear and side surfaces too.
Use the actual lettering and logo proportions. Avoid resizing a logo in a way that distorts it simply to fill a shape. If the artwork does not fit, revise the composition or the fascia rather than compromising the identity.
Also check the relationship with people and products at the intended scale. The aim is an understandable design, not an image that only works because the camera is placed unusually high or far away.
How should lighting be considered?
Show the intended visual treatment clearly, including whether branding is meant to appear backlit or illuminated from another direction. Then separate that appearance from the electrical and installation specifications the responsible team must supply.
Avoid letting a render imply that a thin feature contains equipment or support that has not been planned. A visual can express an idea without answering how it will be built. Record that unresolved detail before the design is treated as final.
A clear lighting intent helps the technical discussion. It should not be presented as a verified engineering solution.
at should the fabricator receive?
Provide the approved form, key dimensions, brand artwork, intended finish and the relevant model or drawing references. Identify which surfaces are visible and which decisions remain open. The fabricator needs more than a flattering image of the front.
Autodesk's OBJ reference illustrates why an exported model's object structure and materials need attention during handoff. For an EaseMyExpo exchange, use the documented OBJ/FBX route and test the result rather than assuming a custom fascia arrives with every production detail already resolved.
Autodesk OBJ import reference (archived documentation
Agree any required structural and event approvals with the responsible professionals. A fascia's visual design should not be mistaken for permission to suspend or support it in a particular way.
How should the client approve the fascia?
Present the alternatives using comparable viewpoints. Ask the client to review brand visibility, visual weight and relationship to the booth, rather than switching between completely different lighting and camera treatments.
Save the selected option with the stall revision. If the layout changes later, revisit the fascia from the affected approaches. A previously good decision can need adjustment when a display moves underneath it.
The best custom fascia is the one that belongs to the booth and the brand, not the one with the most complicated silhouette.
How do you keep the review grounded in the real booth?
Use a two side open booth where the company name must remain legible from both aisle approaches without blocking the interior. Review the design at more than one scale: the overall arrangement, the visitor eye level view and the detail that carries a product or brand message. If a requirement comes from the organiser, venue or production team, keep that source with the project rather than relying on memory. If a dimension comes from a product datasheet or client drawing, label it as such. This creates a visible chain between the brief and the design. It also makes later changes easier to judge because the team can see which assumption or source has changed.
What usually goes wrong at approval time?
The common problem is not that the design lacks another decorative option. It is that different people believe they approved different things. One reviewer may be approving the layout, another the visual style and a third the buildable detail. State the scope of each review. A layout approval should settle zones and major object positions without pretending that every material is final. A visual approval can settle fascia, branding hierarchy and presentation direction while leaving documented technical questions open. This staged approach is especially useful for fascia design because it reduces the chance that a late comment quietly reopens an earlier decision.
What should be recorded for the next project?
Keep the final brief, approved views, current model, artwork list, significant organiser clarifications and a short record of what changed during delivery. Do not save only the prettiest render. The reusable value is the reasoning: which dimensions mattered, where circulation became tight, which asset had to be rebuilt, which view helped the client approve the booth and which information the fabricator requested later. A compact project record turns one exhibition into better input for the next one without pretending that rules from one organiser automatically apply elsewhere.
How do you close the review without ambiguity?
End the review with a short written recap: what is approved, what changed, what remains open and who owns each open item. Attach the exact revision being discussed rather than relying on a chat message that could refer to an older image. For fascia design, this final step matters because the next team may work from a drawing, model export, artwork file or production note rather than from the presentation itself. A clean recap prevents approval from becoming an assumption and gives the fabricator or specialist a clear place to ask the next technical question.
What makes this useful in a real exhibition project?
The answer is traceability. For fascia design, every important choice should point back to a requirement, a measured input, a current source or an explicit creative decision. That makes review faster because people can challenge the right thing. If the booth changes, update the affected information rather than quietly replacing a render and hoping everyone notices. If a vendor or software tool produces an output, label what that output represents. A concept view, editable model, presentation video and fabrication drawing are different deliverables even when they describe the same stand. Clear labels reduce rework and make the project easier to hand to someone who was not present during the original discussion.
How should teams document decisions?
Use a short revision record with the date, the change, the person who approved it and the files affected. Keep that record beside the live model and presentation material. For fascia design, this is more useful than relying on filenames such as final, final two or latest. A disciplined record also helps distinguish a client preference from an organiser requirement or a production constraint. When those categories are visible, later discussions become easier because the team knows which decisions can be reconsidered and which need formal confirmation from another party.
Final check before approval
Confirm the booked footprint. Check every open side. Verify the working units. Record unresolved assumptions.
- Dimensions
- Artwork
- Approvals
- Scale
- Materials
- Access
- Signage
- Lighting
- Storage
- Ownership
- File status
- Artwork status
- Approval owner
- Open sides
Frequently asked questions
Is a fascia the same as a hanging sign?
Not necessarily. A fascia can be part of the stall's visual frontage or upper treatment; a suspended sign is a particular installation arrangement. Specify the actual design and support requirements.
Should the same branding appear on every side?
Only when it serves the approach and communication plan. Review the design from each relevant aisle instead of repeating artwork automatically.
Can I create my own fascia in EaseMyExpo?
Custom 2D/3D fascia is part of the documented product scope. Test the required shape in the current platform and coordinate the technical build separately.
Does a rendered fascia prove it can be fabricated?
No. It communicates appearance. The real materials, support, connections and event conditions need the appropriate technical work.
Build a fascia around your brand
Explore EaseMyExpo's custom fascia workflow and review the result as part of the whole stall, not as an isolated decorative object.